Installing an LGA 1851 Processor
Important: You can only install the processor in one direction. Make sure it is properly inserted into the socket before closing the load plate. If it doesn't close properly, do not force it as it may damage your processor. Instead, open the load plate again and double-check that the processor is properly aligned.
-
Remove the plastic protective cover from the load plate.
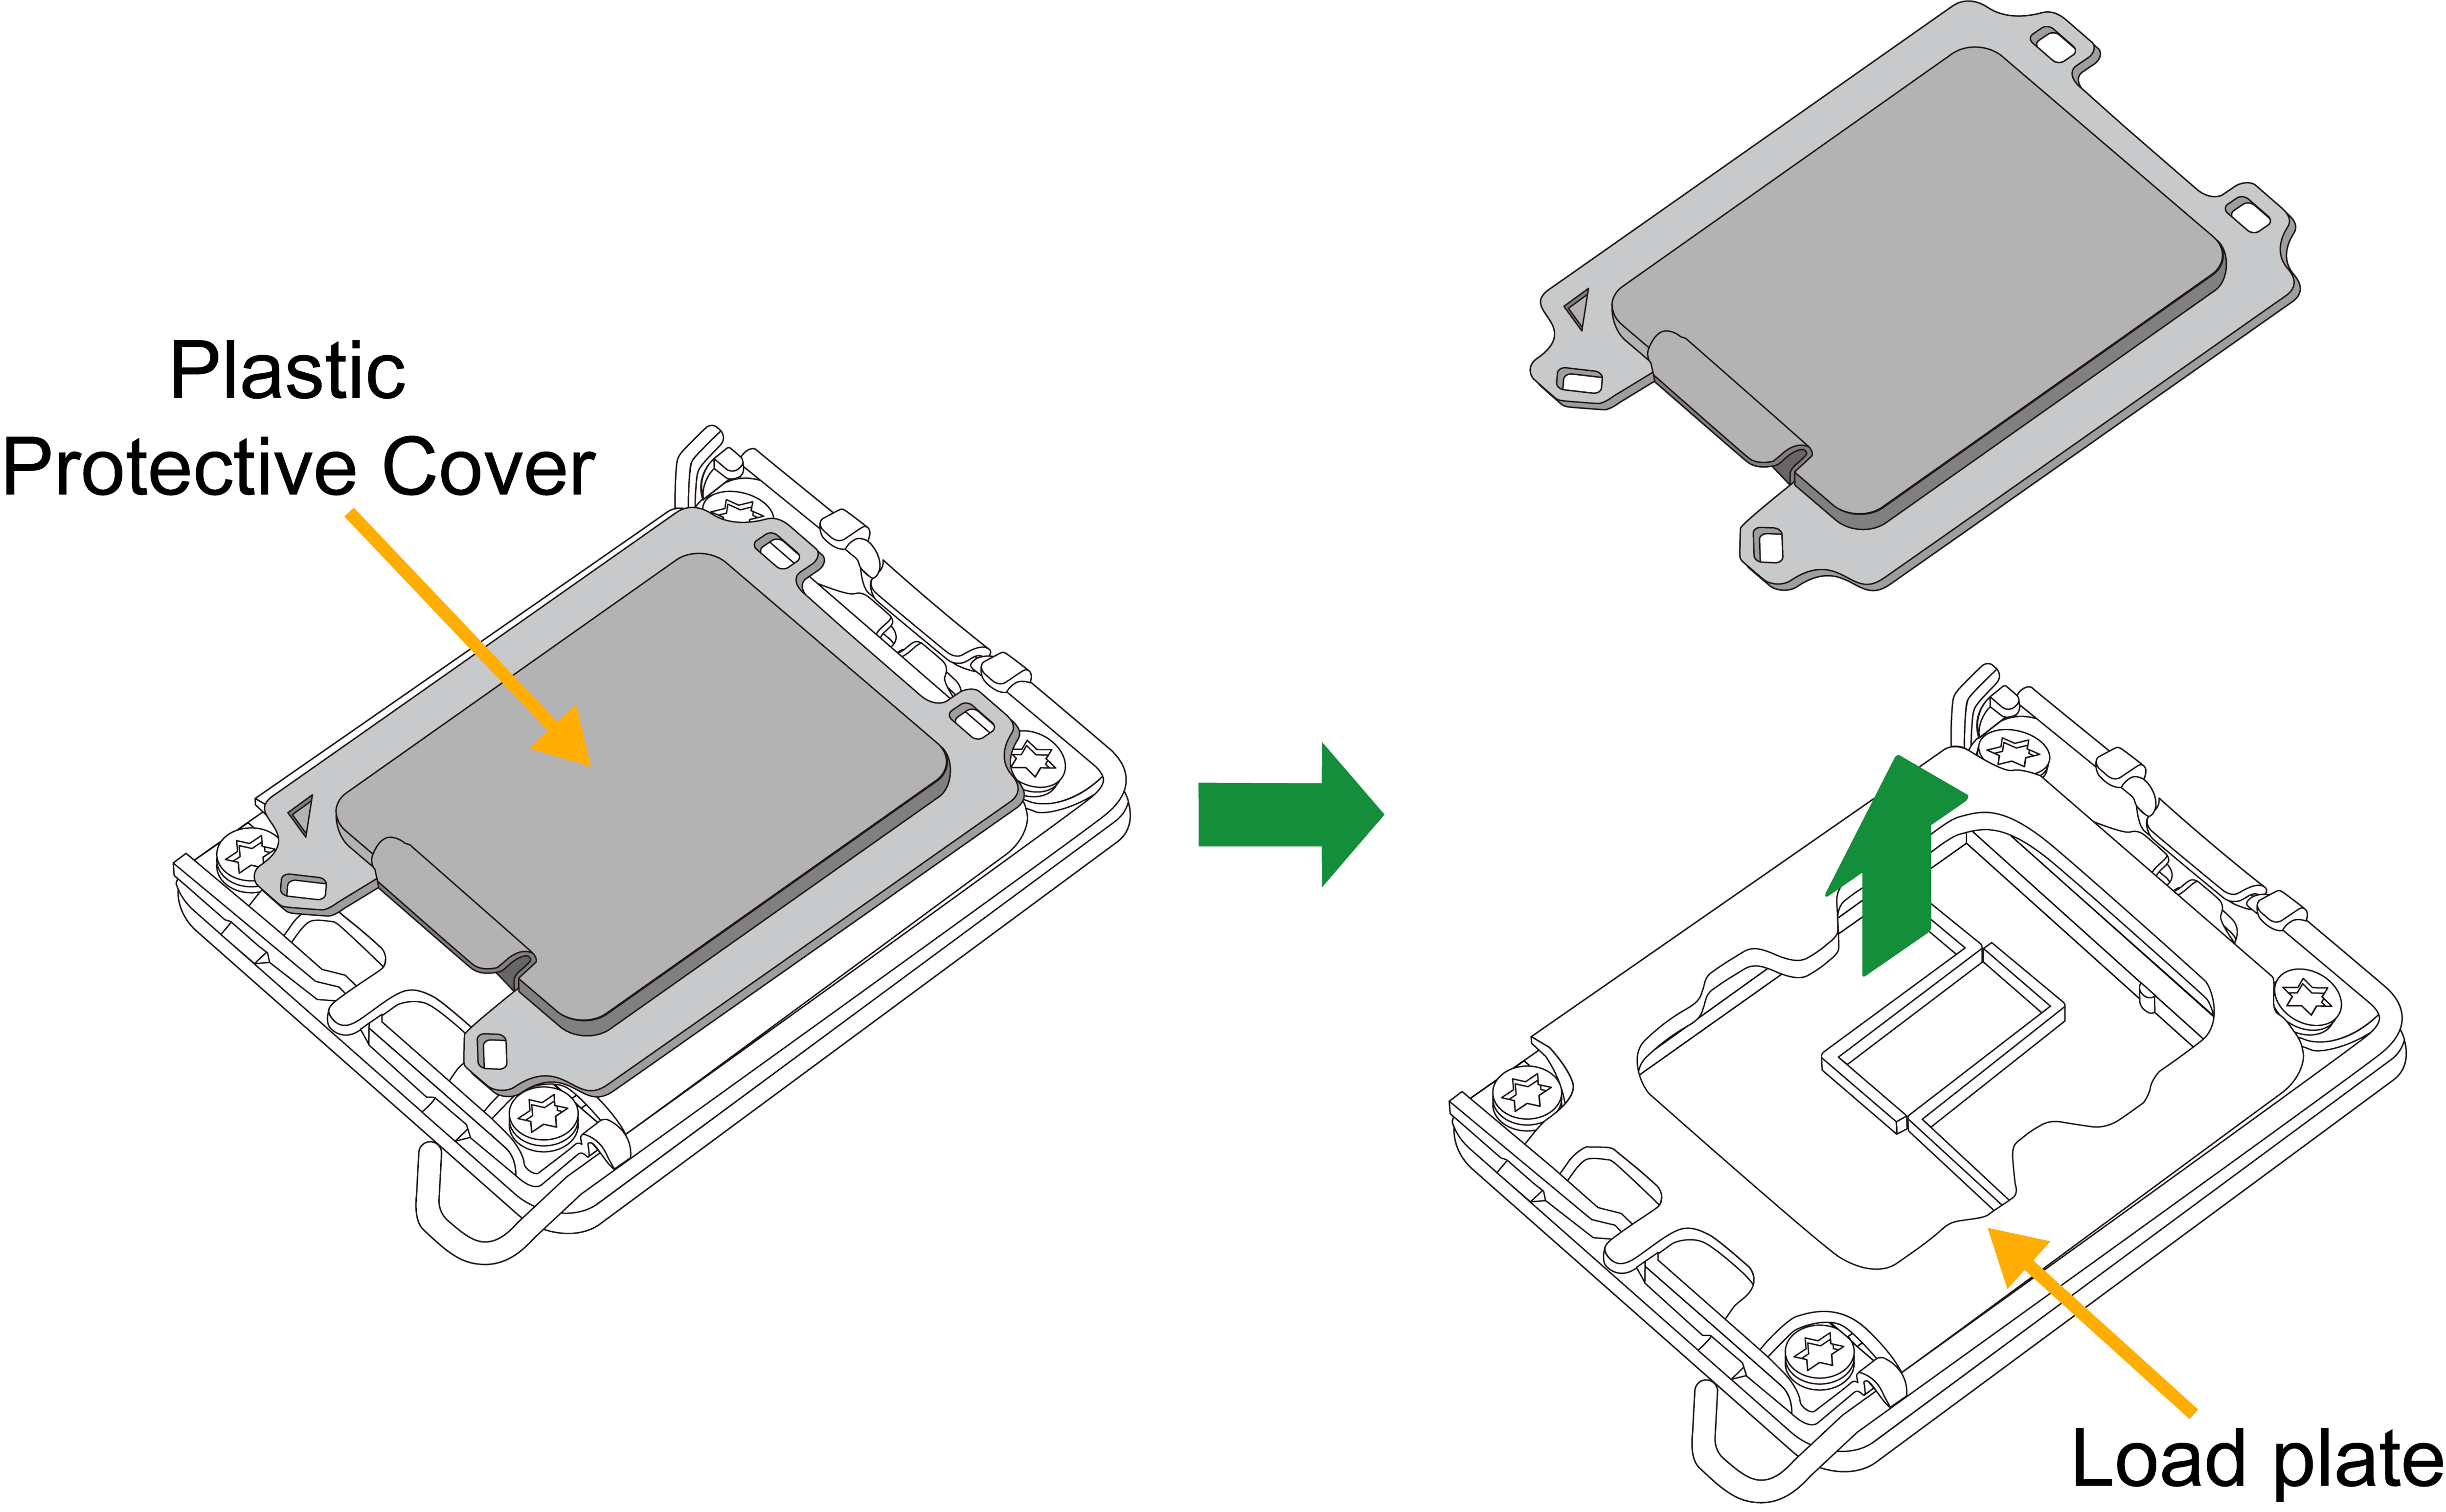
Figure 10. Remove the Protective Cover
-
Gently push the load lever down and away from the lever lock. Then lift it up completely.
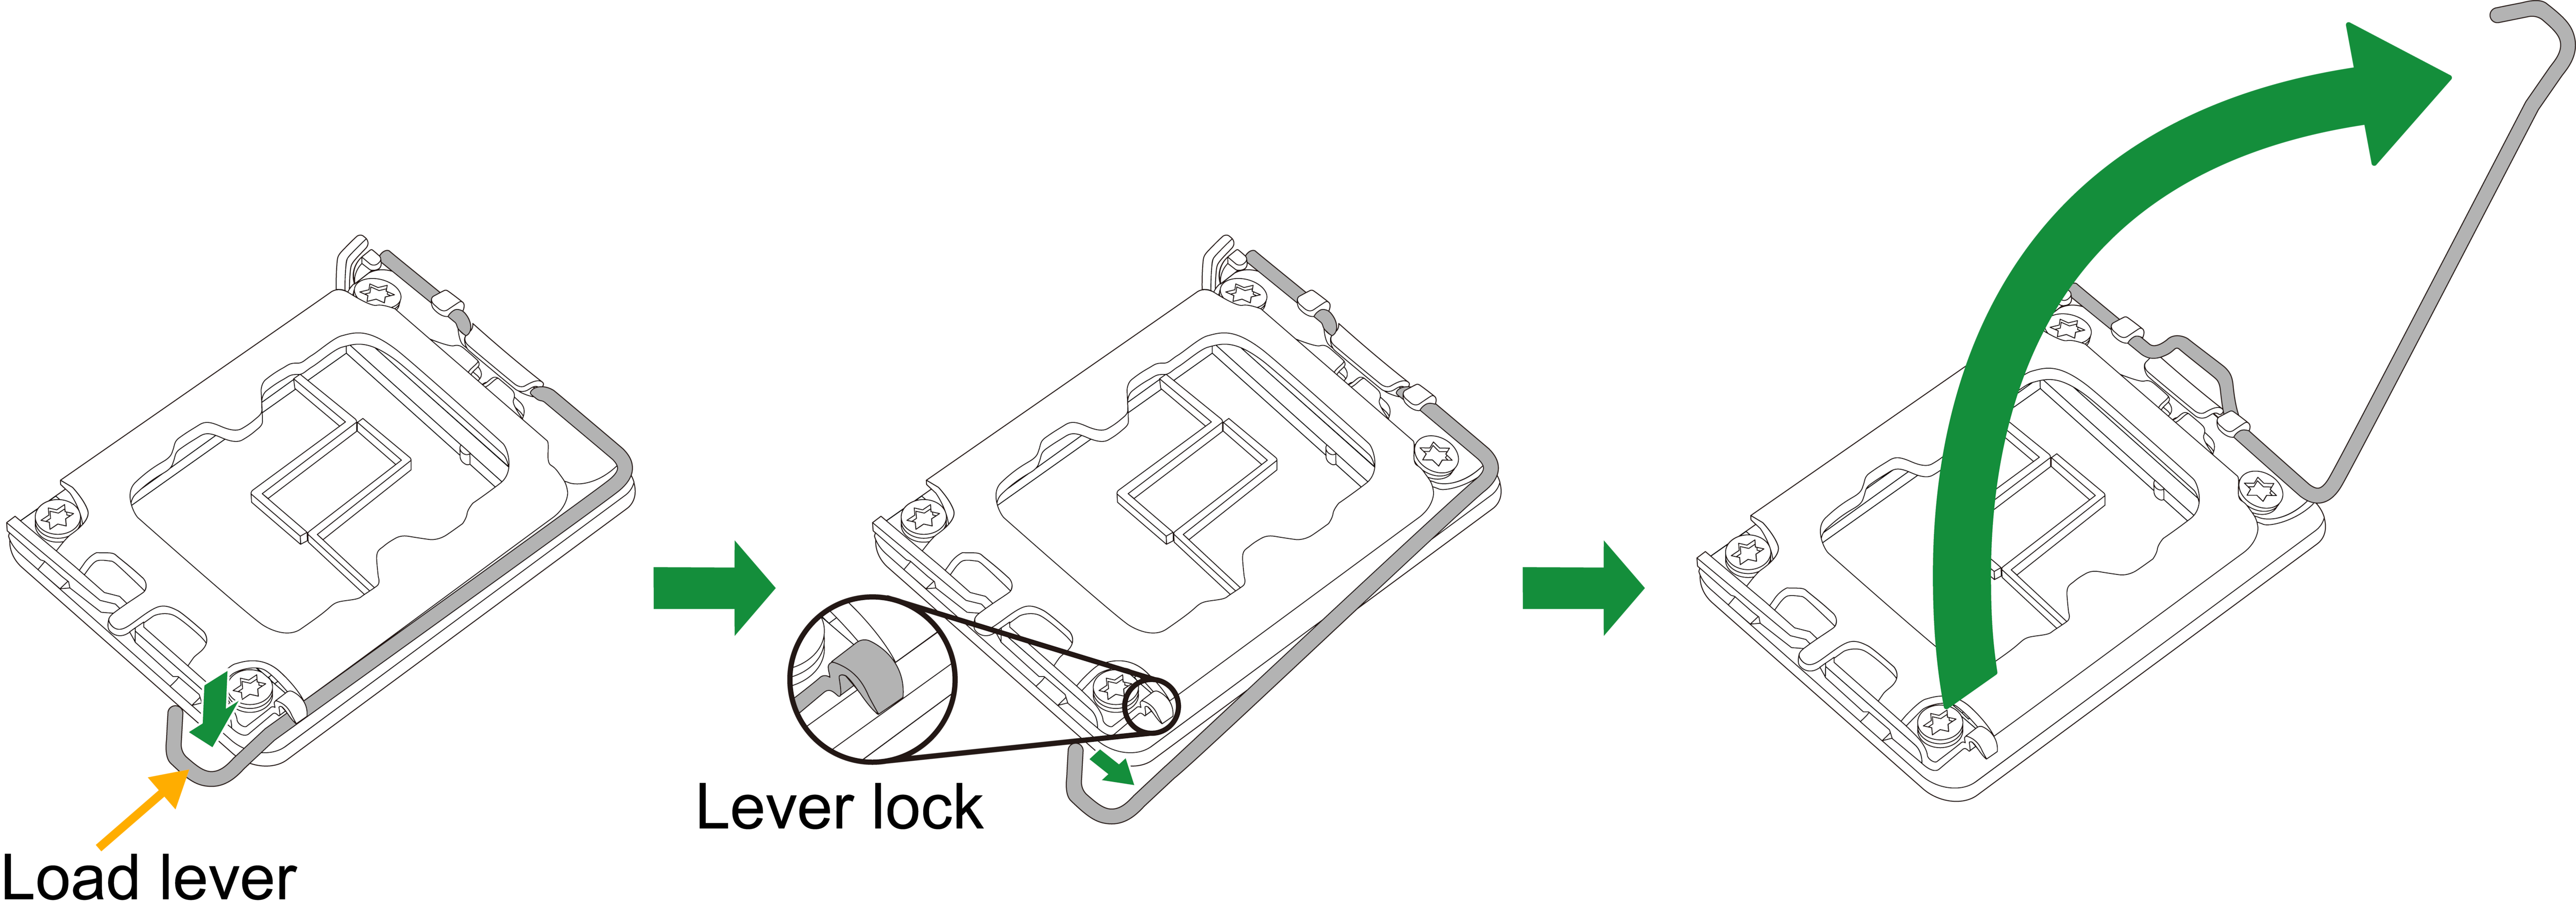
Figure 11. Release and Lift Up the Lever
-
Lift the load plate to open it completely.

Figure 12. Open the load plate
-
Carefully hold the processor by its edges. Align the small triangle marker and notches on the processor with the corresponding triangle marker and notches on the processor load bracket. Once aligned, carefully lower the processor straight down into the socket. (Do not drop the processor on the socket, or move it horizontally or vertically.)

Figure 13. Align the Notches and Install the Processor
-
Do not rub the processor against the surface or against any pins of the socket to avoid damaging the processor or the socket.
-
With the processor inside the socket, inspect all the corners to make sure it is properly installed.
-
Close the load plate with the processor inside the socket. Gently push the load lever down until it locks under the lever lock.

Figure 14. Close the Load Plate and Push the Lever Down